Remarks help identify resources and search projects. They do not change exit IP, region or protocol. Confirm that the same remark should apply to every selected resource before updating.
Images show the Chinese management prototype with demonstration data. Counts, IPs, amounts and dates illustrate the workflow; use your actual dashboard.
1. Select target resources
- Find the proxies with search, type and region filters.
- Select entries and check count, IPs and pagination.
- Confirm scope before a bulk action; visible rows are not necessarily selected rows.
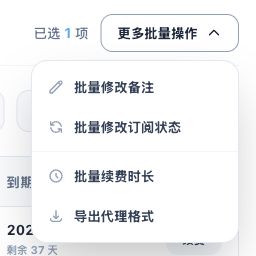
2. Edit remarks in bulk
- Open More bulk actions → Bulk edit remarks.
- Enter an identifiable project, purpose or business reference.
- Confirm it applies to every selected proxy, then choose Confirm update.
- Check the list and search the new remark to verify the result.
3. Use clear names
A short project / purpose / sequence naming pattern makes resources easier to find. Applying one remark replaces the previous remarks on selected resources; process different groups separately if they need different text.
4. Keep secrets out of remarks
Do not enter proxy passwords, verification codes, full customer details or wallet private keys. Remarks are identifiers, not resource configuration or account permission settings.
Related guides: Proxy management overview · Protocols and configuration FAQ · Connection troubleshooting FAQ · Purchasing, payment and expiry FAQ